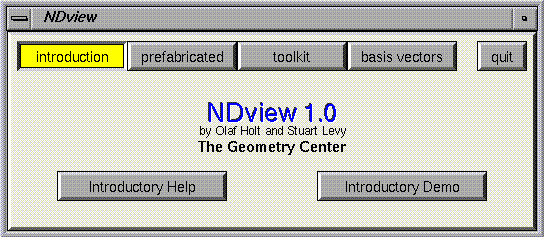
The first thing you see when you start up NDview is this Introduction Panel. The row of four buttons at the top corresponds to the four panels, and pressing the quit button will exit the module. When you press the "Introductory Help" button, a new window will appear with a recipe for how to create and view your own objects in NDview. The "Introductory Demo" button starts up the truly interactive version of the Tesseract Demo
The following paragraphs explain one simple data structure for describing objects in Geomview, and how to get started viewing such an object using NDview.
An nMESH is a two dimensional lattice of points whose position in some n-dimensional space is specified by a list of n-tuples. Here is an example of a crude approximation to a part of the ordinary paraboloid f(x,y) = x^2 + y^2:
nMESH     #a keyword begins the data
3         #dimension of the ambient space
3 2       #fineness of the lattice,
          #  in two directions
-1  0  1  #a list of n-tuples
 0  0  0  #in this case, we have
 1  0  1  #points of the form
-1  1  2  # x y f(x,y)
 0  1  1  #arranged in order, as if
 1  1  2  #reading off a grid.
Another example yields four faces of a cube lying
in four dimensions:
nMESH            #the same keyword
4                #dimension
2 5              #size of the grid
0 0 0 0  0 1 0 0 #list of n-tuples
0 0 1 0  0 1 1 0 #the spacing is
0 0 1 1  0 1 1 1 #not crucial, as
0 0 0 1  0 1 0 1 #long as white-
0 0 0 0  0 1 0 0 #space separates
                 #the numbers.
In order to include several nMESH objects within a single file, simply
concatenate the nMESH objects and add the keyword LIST at the top:
LIST
nMESH
. . .
nMESH
. . .
You can find more examples in the standard Geomview data directory under NDview/geom.
There are many ways to use NDview to look at an object in N-space. The following recipe describes one simple method. Other methods are described on the Prefabricated Panel
1. Start NDview. To do this, first start Geomview, then click "NDview" in the "MODULES" browser.
2. The NDview Introduction Panel will appear. Select the "toolkit" option in the NDview panel, and then increase the "current (maximum) number of dimensions" if necessary to accommodate your object.
3. Still in the "toolkit", click on the "New Window" button. This panel allows you to choose the coordinate directions used for projection. For example, if you have a five-dimensional object, and you want to see it projected into the first three coordinates, press "1" "2" and "3", then press "Done". A new Geomview camera window should appear, with a label on the top corresponding to your choice of projection axes.
4. Load your datafile in the usual way for Geomview, starting with the "Load" button on the Geomview main panel. If your object projects to something visible by your camera, you should be able to see the object in the newly created window.
5. Finally, select the "basis vectors" button on the NDview panel. NDview now shows the basis vectors of the space into which object is being projected, and the position of the camera within that space. If you have several windows, the information is shown for the current window, which may be the last one visited by the mouse.
At this point you can fly around the object and examine it using the usual Geomview controls. You can also quantitatively specify the subspace and camera position by modifying the values on the NDview Basis Vectors panel.
These introductory paragraphs have necessarily simplified some issues. I hope that this is enough to begin.
 The Prefabricated Panel