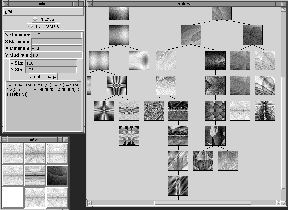
Figure 1: The three main windows of the toolkit: selection window (lower-left), inspector window (upper-left), and history window (right)
A screen snapshot of a typical session with the toolkit is shown in Figure 1. The three main windows can be seen: the selection window, the inspector window, and the history window.

Figure 1: The three main windows of the toolkit: selection window
(lower-left), inspector window (upper-left), and history window (right)
The selection window displays nine images - the current gene pool. The user can go on the next generation in two ways. First, the user can double-click on an image. In this case, the selected genome is moved to the upper left corner for reference and then eight new genomes are created by mutation from the selection and displayed. The second way of getting a new generation is by selecting two parents to be crossbred. When this happens, the two parents are moved to the upper left and seven children are generated by crossover of genes and mutation.
The history window provides the user with a visual history of the problem space they have investigated. It allows the user to go back to a previous choice if they have run into a genetic ``deadend''. It also gives the user an additional gene pool that can be used when crossbreeding genomes.
The contents of the inspector window vary with the module that is in use. It controls various parameters specific to the selected module. Typically it also displays the currently selected genome and has an option to create a larger view of a the selected image.