The Strange Surface Called The Projective Plane
Objective:
Discover the projective plane surface and its topological properties
Materials Needed:
- Scissors
- Glue or Tape
- Paper
- Colored Markers or Pens
Launch:
What does the projective plane surface look like?
Activity 1:
Cut out a circular disk from a sheet of paper. Mark the center of the
disk and draw at least 10 diameters on the disk using a colored pen or
marker. Label the opposite ends of each diameter with a letter of the
alphabet and its prime (ex. A and A', B and B', etc.). Glue the opposite
ends of the diameters together (ex. glue A to A', glue B to B', etc.).
Finish gluing the rest of the edge of the surface together in this manner.
This method of gluing insures that a point is not glued to itself.
Question:
Was this task easy to complete? Why or why not?
Activity 2:
Cut out another paper disk and mark the disk as you did in Activity 1.
Make one cut on a radius. Try gluing the opposite ends of the diameters
together.
Questions:
- Was this task easy to complete? Why or why not?
- Is the surface constructed in Activity 2 equivalent to the surface
that we tried to construct in Activity 1?
- What is the Euler characteristic of this surface?
Comments:
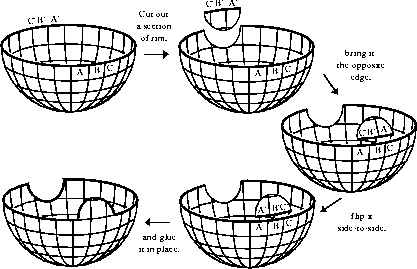
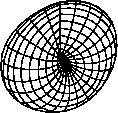
The surface you tried to make is called a projective plane. Since the
actual surface of a projective plane is hard to visualize, two ways to
picture the projective plane are pictured below.

How to glue opposite sections of rim.

Crosscap - Projective Plane
Another way to picture the projective plane is to draw a picture of the
process in Activity 1 and indicate with arrows the gluing.

Extensions:
- Is a projective plane topologically equivalent to a sphere?
- Is a projective plane topologically equivalent to a Klein bottle?


