Picture 2.
Picture 3.
Picture 4.
Picture 5.
Here is the interactive
sketch.
Otherwise you can look at this sequence of pictures.
Picture 2.
Picture 3.
Picture 4.
Picture 5.
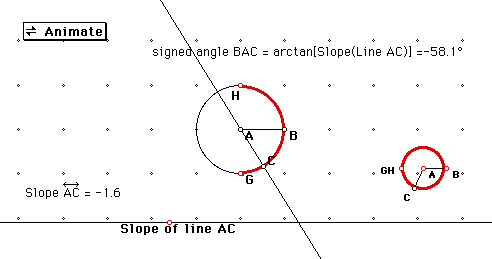
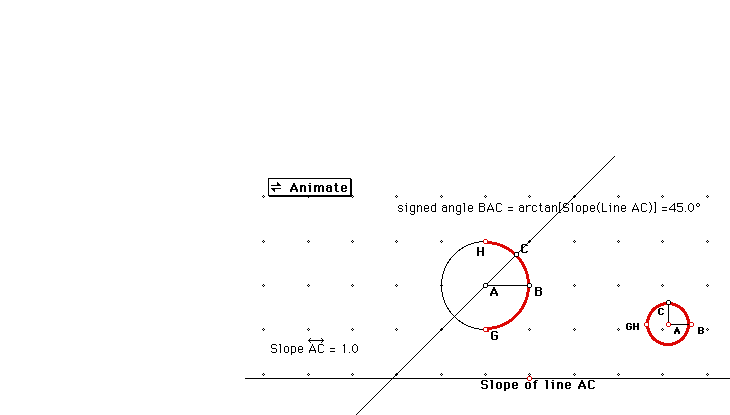
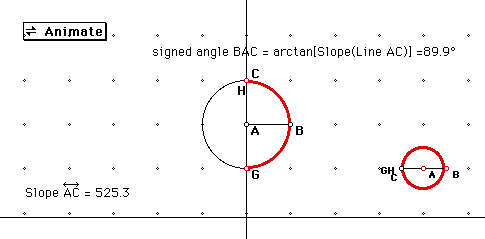
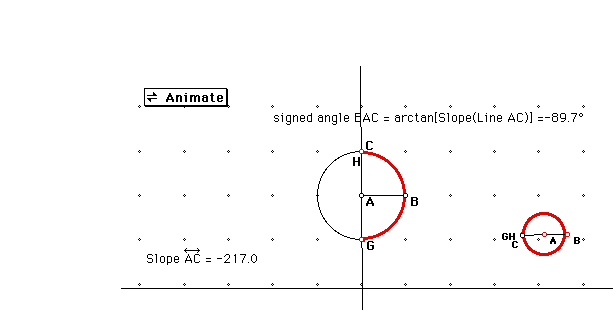
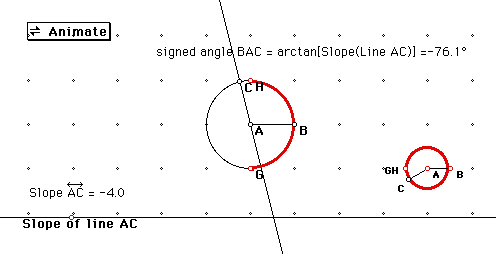
In the sketch, line AC rotates around the origin, A. The rotation is controlled by point C on the unit circle. At the bottom of the sketch, there is a number line on which is plotted the slope of line AC. Double-click the Animate button and watch (or imagine) how the slope of AC changes as C moves around the circle.
Things you might have noticed:
If connecting the ends of an infinitely long line makes you really nervous, use the right red semicircle instead. This represents all slopes, negative and positive, and also represents the corresponding angles that the line makes with the x axis: from -90 degrees to 90 degrees. This gives a one-to-one (and continuous, for those who know calculus) correspondence between the points of the number line and the points of the semicircle, excluding its endpoints at -90 and 90. Now bend this semicircle until the two missing endpoints come together and fill in the gap with a point at infinity. You get a circle, or at least a loop. Each point of this circle corresponds to a distinct slope, including vertical lines. As point C goes around the original circle once, the corresponding point goes around the smaller circle twice.
Interactive sketch.
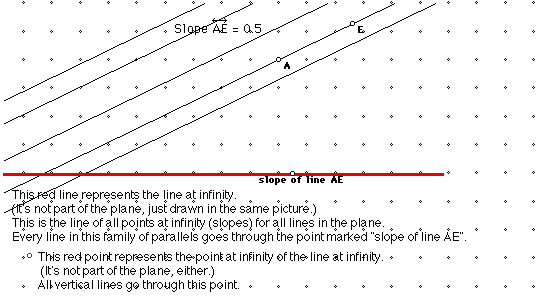
Now we have a Euclidean plane, a new line of points at infinity, and a point at infinity for the line at infinity. (All the points at infinity form a projective line , which has the shape of a loop.) We also define some new "incidence" relations: what points are on what lines, and what lines intersect at what points.
A point at infinity is on every line that has the slope it corresponds to.
Every point at infinity is also on the new line at infinity. So now two lines always intersect: parallel lines intersect at the point at infinity corresponding to their common slope. The line at infinity intersects any regular line at the point at infinity corresponding to the regular line's slope.
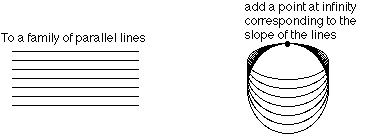
The Euclidean plane is an infinite flat surface. What does the projective plane look like, once all these new strange points are added? Here are some pictures.
More explanations of the pictures:
The projective plane doesn't go off to infinity; all the infinite
lines have been turned into finite loops.
To see how to get these strange shapes by adding new points to the
plane, first shrink the entire plane onto a disk
that doesn't include its boundary. You can think of this disk
as the interior of the circle that point C moves on in the first sketch.
A line through the origin in the plane
now corresponds to a diameter of this disk.
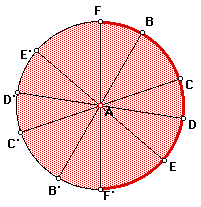
The two missing endpoints, for example, C and C',
of the diameter correspond to the "ends"
of the original line. Connect the ends of the diameter with a point at infinity
corresponding to the slope of the diameter. Now it's a loop, not a line.
Do this to every diameter. Note that you have to do it only for half the
circumference of the disk, since the other half is taken care of by the
other endpoint of each diameter.
If you try to do this procedure with a piece of cloth, you will see that you soon get a snarly mess. The disk has to cross through itself to finish all the connecting. The pictures you saw are what you would get if you could actually do this.